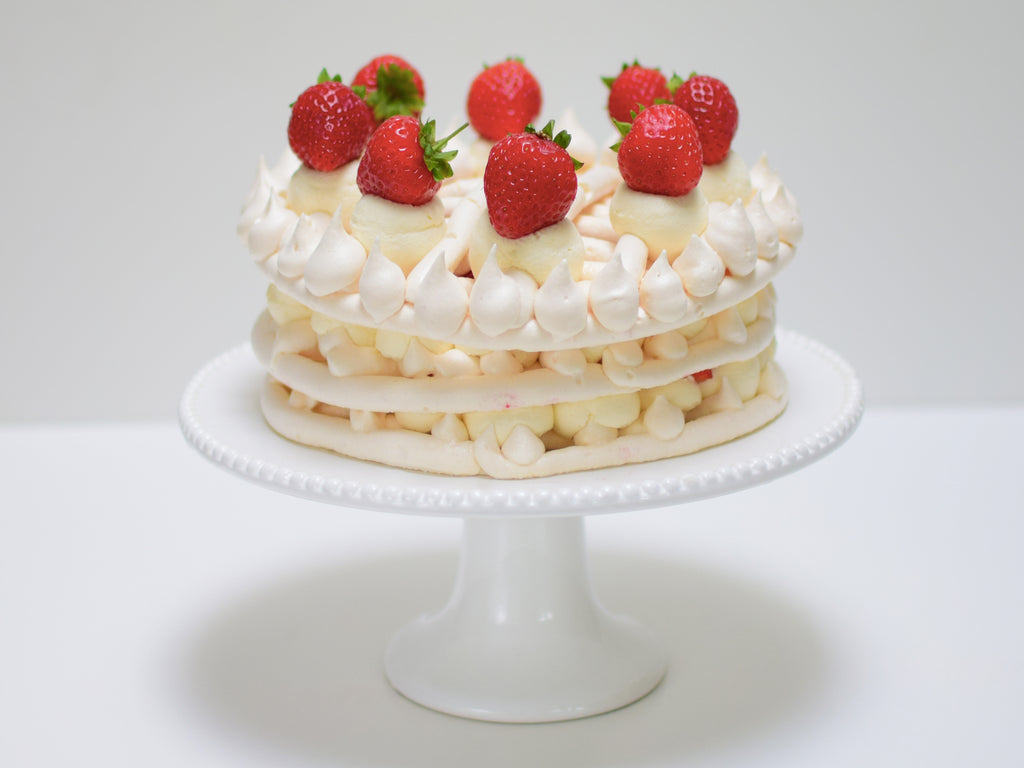

Strawberry Pavlova
This very professional looking dessert is really very simple to make and makes a spectacular pinnacle to a summer supper party.
Use the tala piping set to pipe three layers of light crisp meringue and to pipe the cream filling when you are ready to decorate it. The meringue lattices will keep for a week, at least, if stored in air-tight containers, so do make ahead if you have time and it makes life easier.
If you can, choose a punnet of strawberries with approximately 8 smaller strawberries as these will look pretty arranged on top of the pavlova. The rest can be chopped for the filling. Do get creative, most non-spoiling fruits will work well with meringue and you can sprinkle on nuts, sauces, coulis, and herbs such as mint or basil if you wish.
Ingredients
3 x egg whites (free-range, medium size)
165g caster sugar
500ml double cream (whipped with 1tsp vanilla extract)
300g strawberries (keep the 8 prettiest strawberries whole, chop the rest)
150g raspberries (chopped)

Equipment
3 x Tala Performance baking sheets (35cm x 40cm x 1cm size is perfect)
Non-stick greaseproof paper
marker pen
20cm circular cake tin (removable base only)
Open tip nozzle set with an icing bag
Tala Indigo and Ivory cooks measure

1. Preheat the oven to 110 degrees Celsius, fan (230 degrees Fahrenheit).
2. Cut non-stick greaseproof paper to line three baking sheets.
3. Use the marker pen to draw around the circular base so you have a perfect circle drawn onto the middle of each piece of greaseproof paper. Flip over the paper so that the drawn-on side faces down. You should be able to see the outline of the circle through the paper.
4. Prepare the piping bag by fitting with the medium tip.
5. Place the egg whites into the bowl of a stand mixer fitted with a balloon whisk attachment and whisk until they are standing in stiff peaks.
6. Add caster sugar one dessertspoon at a time until incorporated (do not rush this step - I briskly count to 8 between each spoonful and it always seems to work well).
7. When the meringue is glossy and holding its shape by standing in peaks, transfer it to the piping bag with a spatula. Do not overfill the bag, just refill it when necessary.
8. Twist the bag at the top to close it and stick each piece of greaseproof paper to its baking tray with a few quickly piped blobs of meringue – one dab in each corner is enough.
9. Now, using the marker pen circle as a guide, pipe a complete circle and then pipe a lattice pattern by piping parallels lines in one direction about 1.5 cm apart, then turning the tray 90 degrees and then piping another layer of lines on top.
10. Repeat the process again for a second layer. Then repeat again for the third time.
11. Assess all three lattices and choose the prettiest as the top layer, as this will be seen. Pipe around the entire circumference of the top layer with small meringue peaks (push down and pull away lightly to get this effect).
12. Bake for two hours and leave to cool in the oven. Transfer to an airtight container until needed.
When you are ready to decorate, have the fruit washed and dried and the cream whipped and ready to go.
1. Fit the piping bag with the largest nozzle and fill with whipped cream.
2. Place the first lattice on the cake stand or serving plate you wish to serve it on, and pipe peaks of cream on top, just inside the circumference of the lattice. Then use the piping bag to 'fill in' the rest of the circle. Gently smooth with a mini palette knife.
3. Sprinkle half the chopped berries over the cream. Place the next lattice on top and repeat.
4. Position the final lattice in place and pipe a ring of peaks on the very top and place a strawberry on each peak.