
Ice Cream Cake
Whether you are looking for an easy dinner party showstopper or a sensational alternative to traditional birthday cake, this ice cream cake might be just the thing you are looking for to celebrate the last days of summer. Combine your favourite flavours of ice cream, and try different cookies, biscuits and sprinkles if you fancy a change or need to tie in with a particular theme. If you want to make a real splash, adorn the top with birthday cake sparklers and present on a cake stand.

This recipe uses shop-bought ice cream but you can, of course, make your own just make sure you have plenty of freezer space as you'll have to allow room for the height of the cake and the ice cream cone.

Ingredients:
For the cake:
500g tub vanilla ice cream
500g tub chocolate ice cream
154g packet dark chocolate sandwich biscuits (I used Oreos) plus 4 extra of the same sandwich biscuits
coloured sprinkles
400 ml double cream
1 tsp vanilla extract
1 tbs icing sugar
ice cream waffle cone
For the chocolate drips:
250g milk chocolate
120ml double cream

Equipment:
Tala Performance deep round cake tin (18 x 8cm, 7x3”)
cling film
18cm diameter foil-covered cake card

- Remove vanilla ice cream from the freezer and allow to soften at room temperature for at least twenty minutes.
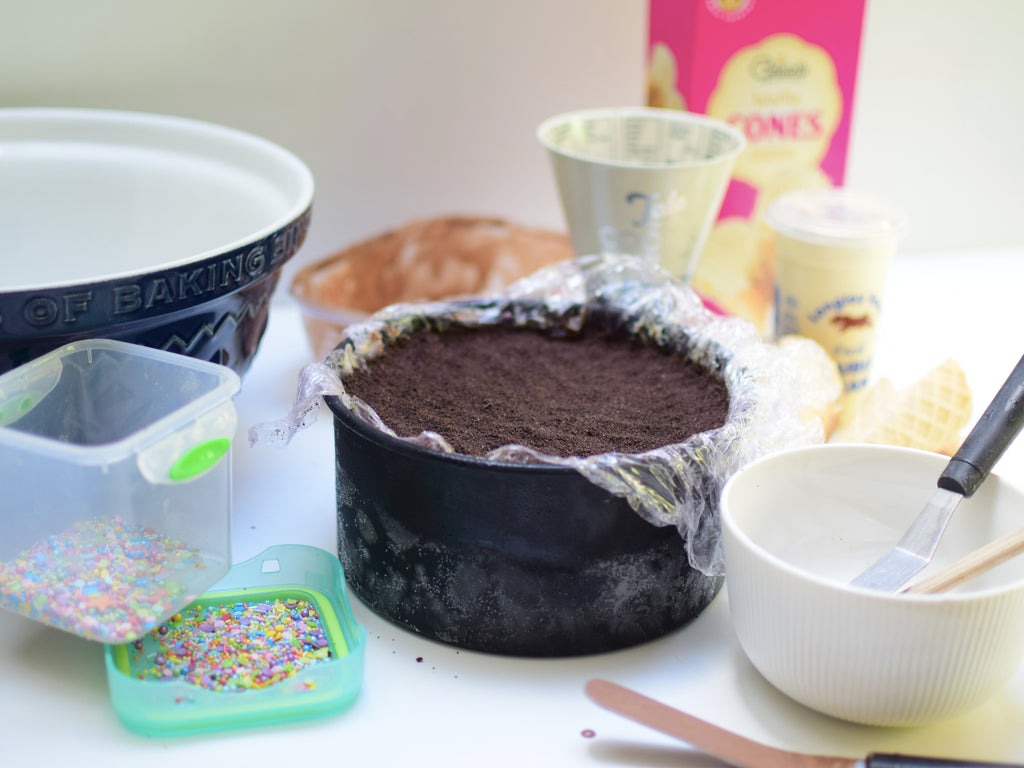
- Line the cake tin with cling film and tip the softened ice cream into the lined cake tin and spread as evenly as possible. You will find that the cling film will try to come away from the sides of the tin at first, but as you spread the ice cream into position, the clingfilm will follow suit.
- Return the tin to the freezer to firm up.
- Place the cookies into a food mixer (saving the remaining four cookies for later) and pulse them briefly to crumbs. Divide the mixture into two and spread one half evenly over the ice cream, and scatter one tablespoon of sprinkles over the top.
- Soften the chocolate ice cream and spread over the sprinkles, then add the remaining cookie crumbs, pat into place and return to the freezer for at least an hour.
- Remove from the freezer and place the cake card foil side down over the biscuit crumbs. Invert the tin so that the biscuit base is at the bottom and carefully remove the tin and then the cling film.
- Place the cake on a chopping board or completely flat surface and return it to the freezer.
- Whip the double cream with the icing sugar and vanilla until standing in peaks. Quickly remove the cake from the freezer and roughly spread about two-thirds of the cream all over the top and sides, smoothing around the sides and top with the pastry scraper. The effect will be rough but don't worry, we will neaten it up later. Return the cake to the freezer to set for around 10 minutes.
- Melt 30g of the milk chocolate spread the open mouth of the ice cream cone with melted chocolate and dip the cone into the sprinkles to decorate.
- Roughly crush the four extra biscuits with the end of a rolling pin and mix with the rest of the melted chocolate. Form the mixture into a rough ball shape and squash it onto the decorated cone to resemble ice cream. (A pair of extra hands to hold the cone while you push the cookie mixture on top it is really helpful here!) Place the cone in a drinking glass (to hold it upright) and refrigerate until needed.
- Bring the cake out again and spread the remaining cream over the top and sides of the cake, using the scraper to create a smoother and neater finish.
- To make a dripping pool of chocolate to cover the top of the cake, place the remaining chocolate with the double cream in a microwavable jug and warm gently in the microwave until the chocolate has melted. Mix with a mini spatula and allow to cool almost completely but while it still has a pouring consistency.
- Remove the cake from the freezer and gently press sprinkles into the sides all the way around the base.
- Dip the rounded top part of the cookie cone into the chocolate, gently shake off any drips and return the cone to the fridge.
- Now, with a mini palette knife in one hand and the jug of chocolate in the other, pour the chocolate onto the middle of the top of the cake and allow it to flow across and down the sides in drips. 'Help' the chocolate along here and there with the palette knife to create picturesque drips and smooth out any ripples.
- Before the chocolate has a chance to freeze completely, rescue the cone from the fridge and jam it down onto the top of the cake at an angle – you should find that it will stay in place as the chocolate solidifies.
- Return the cake to the freezer until ready to serve. No need to let the cake soften, just take out of the freezer, slice and serve.
caroline
try this